Blog
7 Basic Crochet Toy Patterns for Beginners – Easy & Fun to Make!
Are you just getting started with crochet and already dreaming of making cute little stuffed animals and toys? You’re in exactly the right place!
Crochet toys — also called amigurumi (the Japanese art of crocheting small, stuffed yarn creatures) — are honestly one of the best projects for beginners. They’re small, they use basic stitches, and the result is something you’ll want to show off to literally everyone you know.
Whether you want to make gifts for kids, decorate your home, or just have something adorable sitting on your desk — these 7 basic crochet toy patterns are the perfect place to start.
Let’s dive in!
Before You Start: What You’ll Need
Before jumping into patterns, let’s quickly go over the supplies you’ll need. Don’t worry — nothing fancy here!
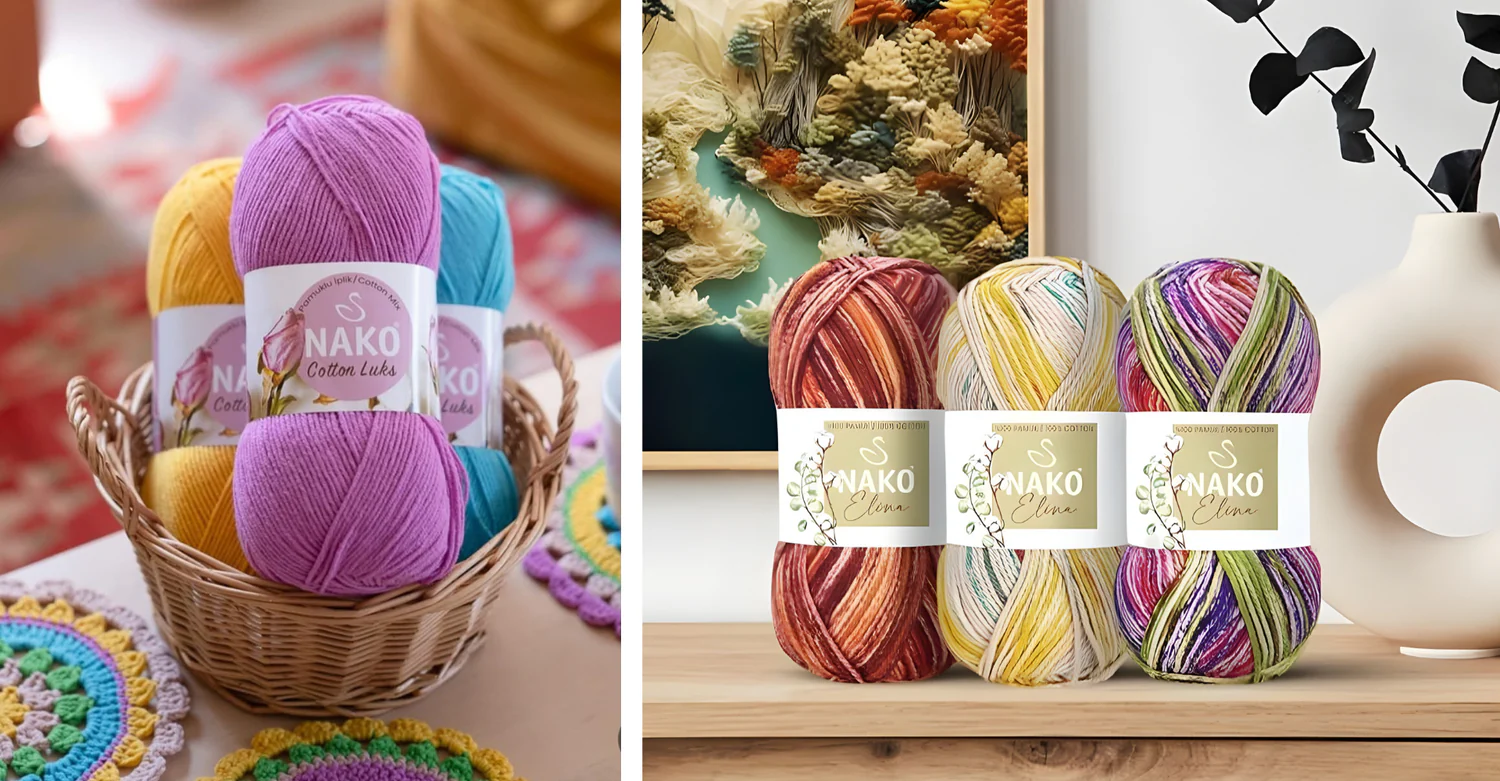
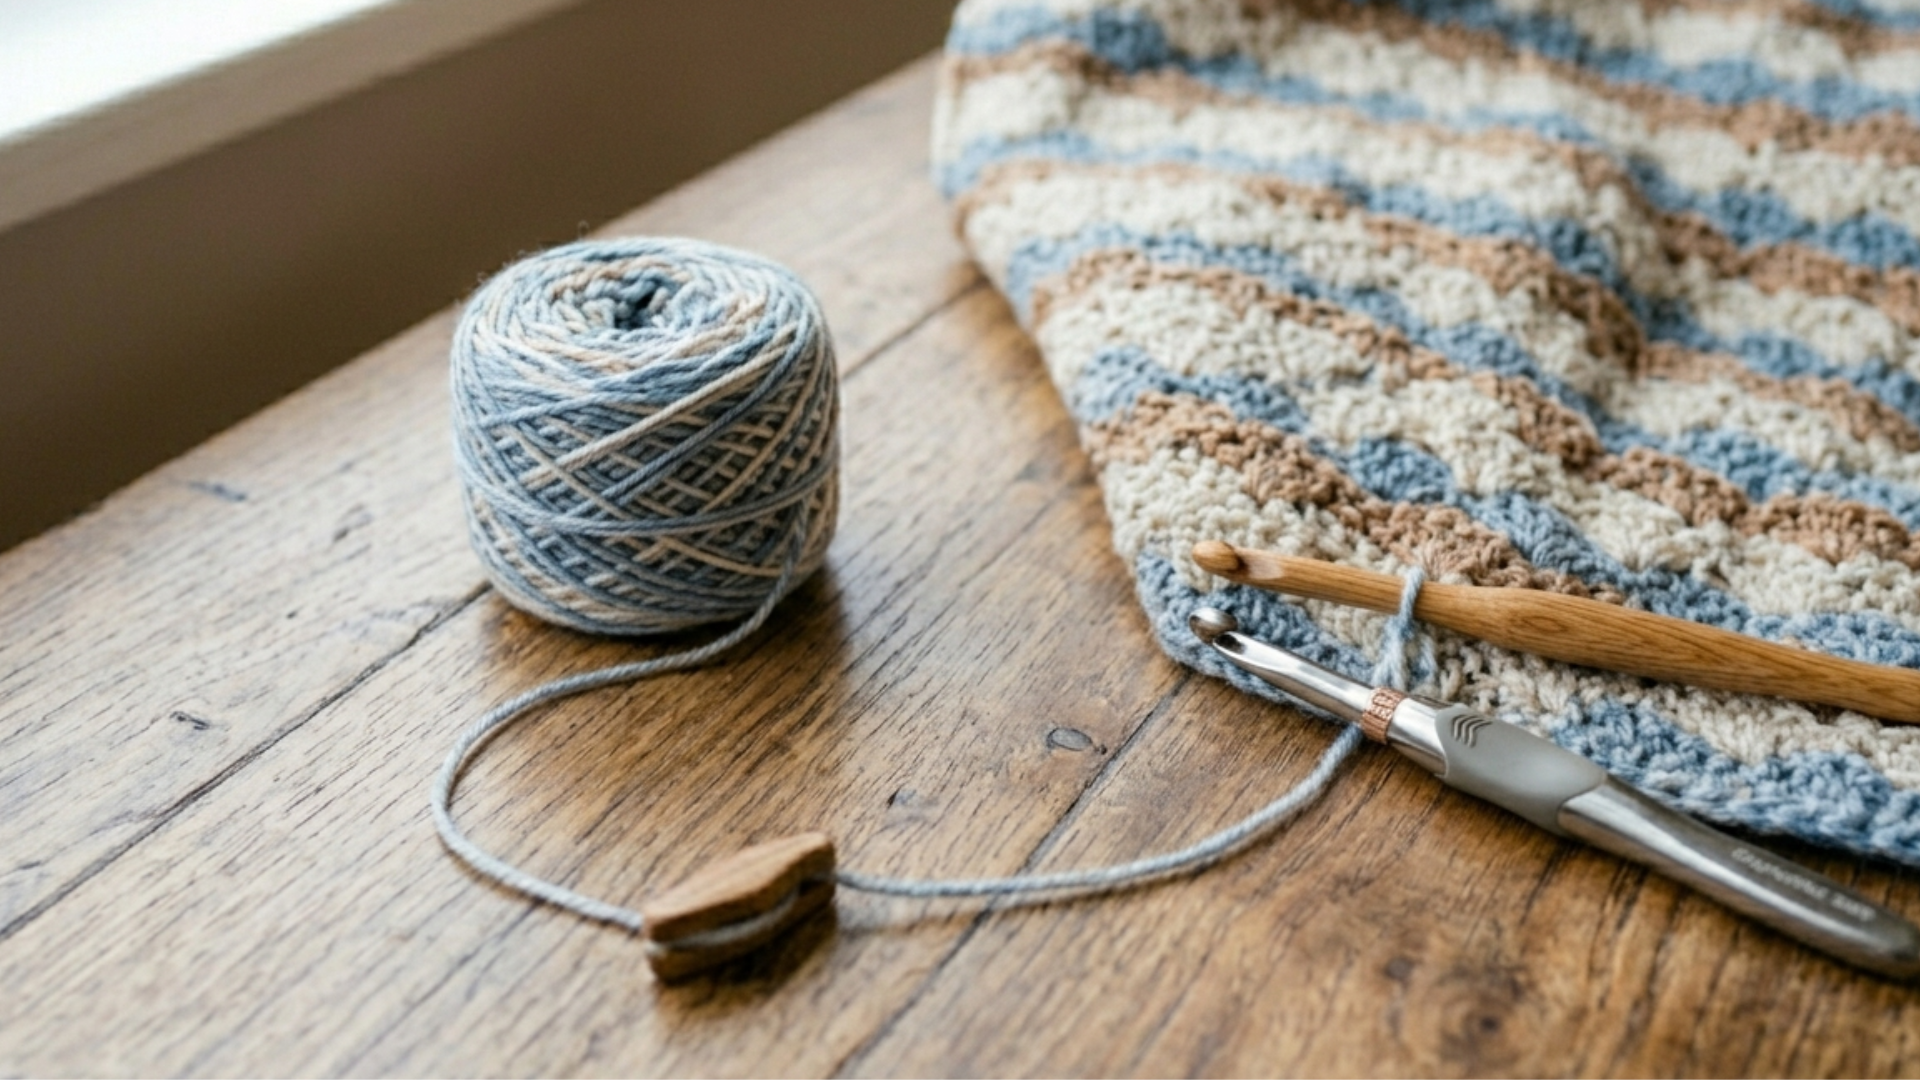
- Yarn – Medium weight (worsted weight, size 4) yarn is the easiest for beginners. Cotton or acrylic both work great.
- Crochet Hook – A 3.5mm to 5mm hook works well for most toy patterns.
- Stuffing – Polyester fiberfill stuffing keeps your toys soft and squishy.
- Safety Eyes – These little plastic eyes snap in and give your toys so much personality! (Skip for toys made for babies and use embroidered eyes instead.)
- Yarn Needle – For sewing pieces together and weaving in ends.
- Stitch Markers – Super helpful for marking your rounds.
Basic stitches you should know:
- Magic ring (or magic circle)
- Chain stitch (ch)
- Single crochet (sc)
- Increase (inc) – two single crochets in one stitch
- Decrease (dec) – crocheting two stitches together
If you know these five things, you’re ready to tackle every single pattern on this list. Let’s go!
1. The Classic Crochet Ball
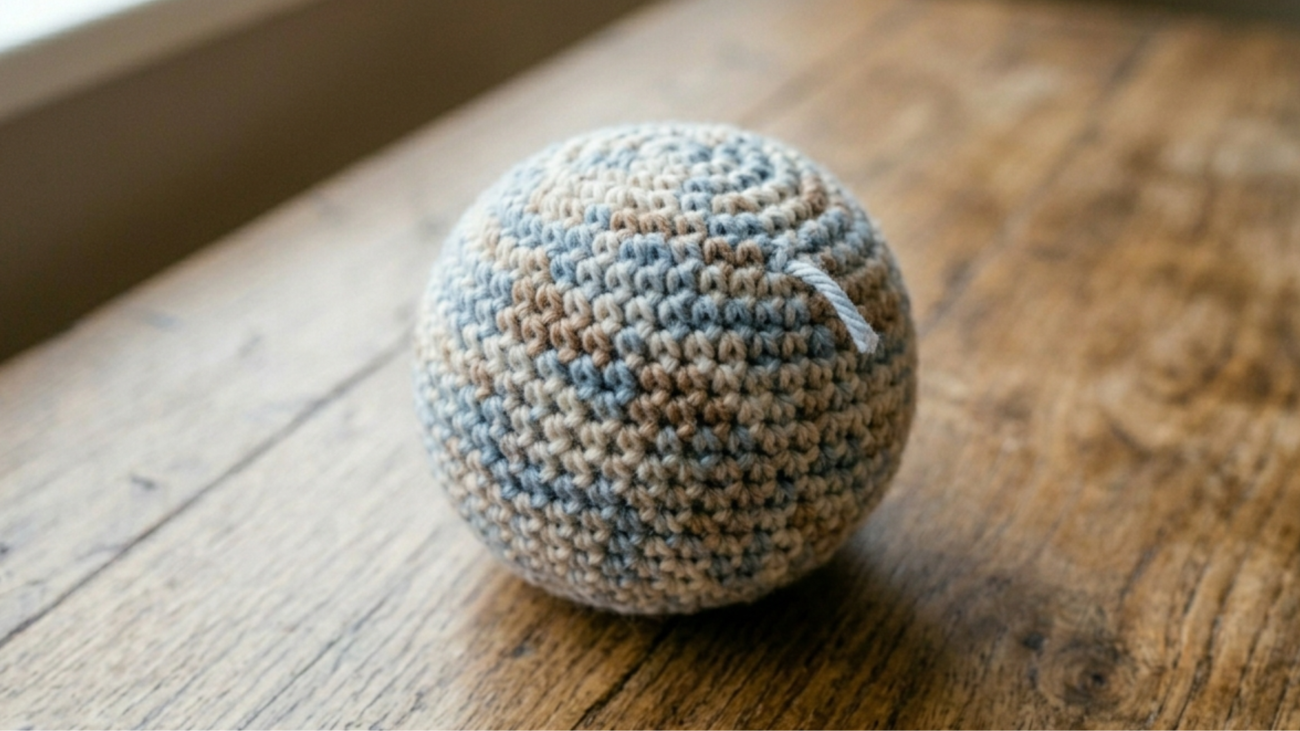
Why it’s great for beginners: A simple ball is literally just increasing, then decreasing. That’s it. If you can do those two things, you can make this.
A crochet ball is one of the most satisfying beginner projects because you can see results SO fast. You can make it in about an hour, and it’s endlessly versatile — make a bunch of different sizes and colors to create a juggling set, a cat toy, or just cute decor balls for a bowl on your shelf.
Basic Steps:
- Start with a magic ring and single crochet 6 into the ring.
- Increase in every stitch of round 2 (12 stitches).
- Continue increasing every other stitch in round 3 (18 stitches).
- Keep adding rounds, increasing every third stitch, until you reach your desired size.
- Stuff the ball firmly as you go.
- Begin decreasing — mirror your increases — until the hole closes.
- Fasten off and weave in your ends.
Tips: Stuff the ball firmly for a nice, round shape. Too little stuffing makes it lumpy and flat.
2. Simple Crochet Bear
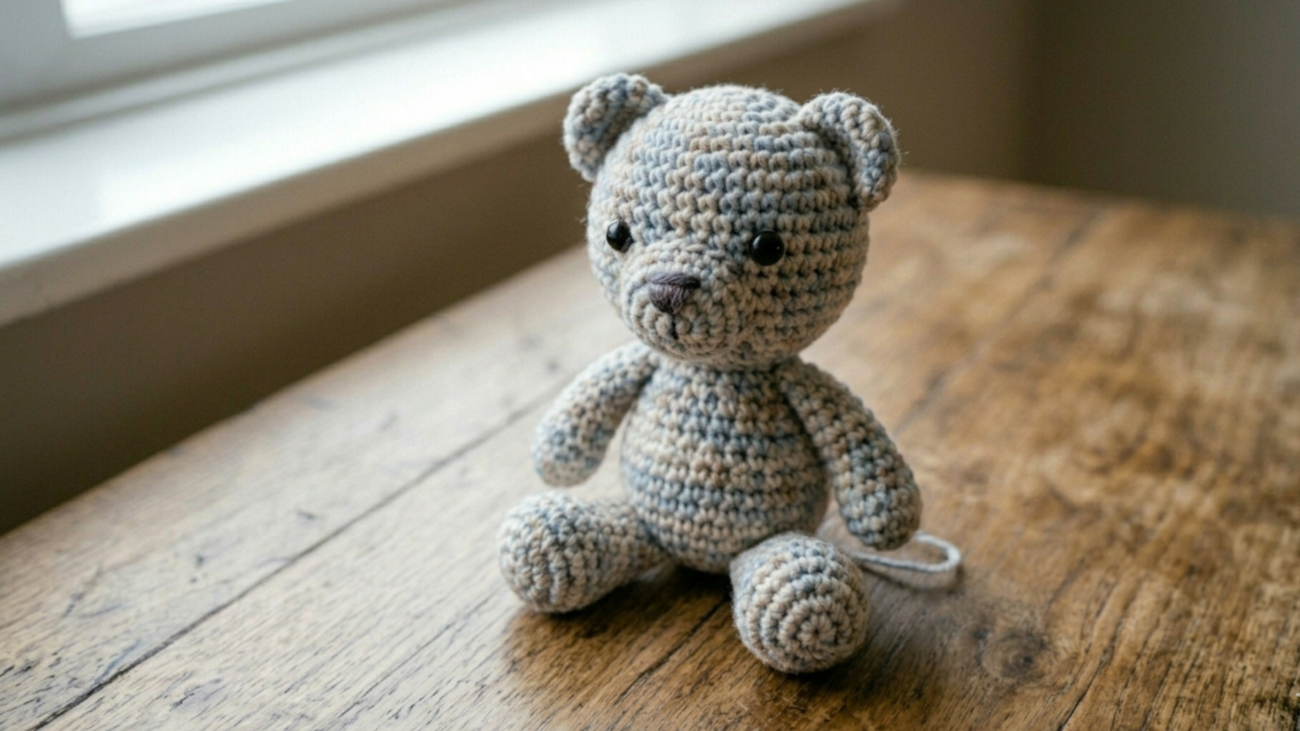
Why it’s great for beginners: Bears are made of basic shapes — circles and ovals. Once you know how to make a ball (which you just learned above!), you can make almost any amigurumi animal.
A little stuffed bear might look complicated, but it’s really just a big ball for the body, a smaller ball for the head, tiny balls for the ears, and sausage shapes for the arms and legs. Put them all together and — voilà — the cutest bear you’ve ever made.
Basic Steps:
- Make the head: Start with a magic ring, increase to about 36 stitches, crochet several even rounds, then decrease back to close.
- Make the body: Same process but slightly larger.
- Make two small circles for ears, four small tubes for arms and legs.
- Attach safety eyes before closing the head.
- Embroider a little nose with yarn.
- Sew all pieces together using your yarn needle.
Tips: Use a whip stitch to attach pieces for the cleanest look. Pin everything in place before sewing so nothing goes crooked!
3. Crochet Bunny
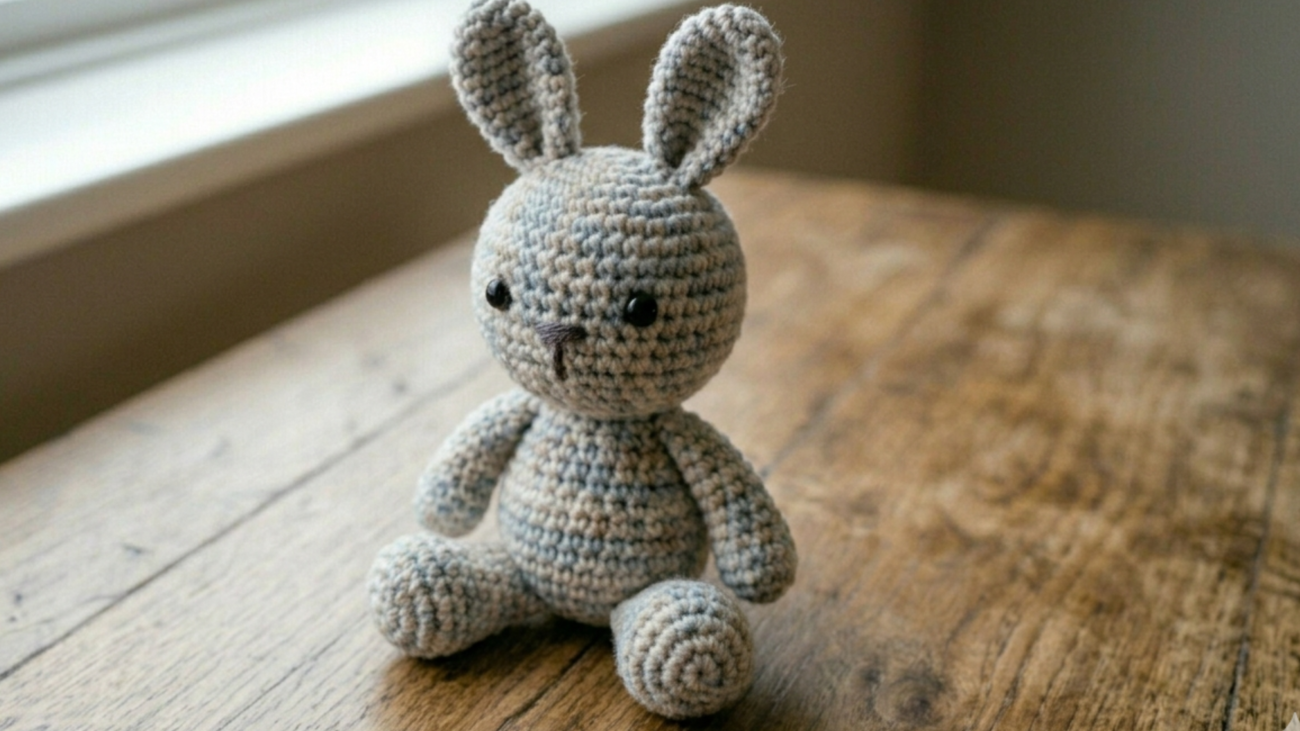
Why it’s great for beginners: Bunnies are insanely popular in the amigurumi world — and for good reason. Those long floppy ears make them look impressive, but they’re actually super easy to make.
The body and head are the same as the bear. The only difference is the long oval ears (which are just elongated tubes, honestly) and a little round tail. This pattern teaches you how to make flat oval shapes, which opens up a whole new world of amigurumi possibilities.
Basic Steps:
- Crochet the head and body the same way as the bear pattern.
- For ears: chain 4, single crochet along both sides of the chain to create a long oval. Make two.
- For the tail: make a tiny pom-pom with yarn or crochet a tiny ball.
- Attach eyes, embroider a nose and smile.
- Sew all pieces onto the body.
Tips: Stuff the ears lightly — or not at all — for that adorable floppy look. If you stuff them too firmly, they’ll stand up straight like cat ears!
4. Little Crochet Mouse
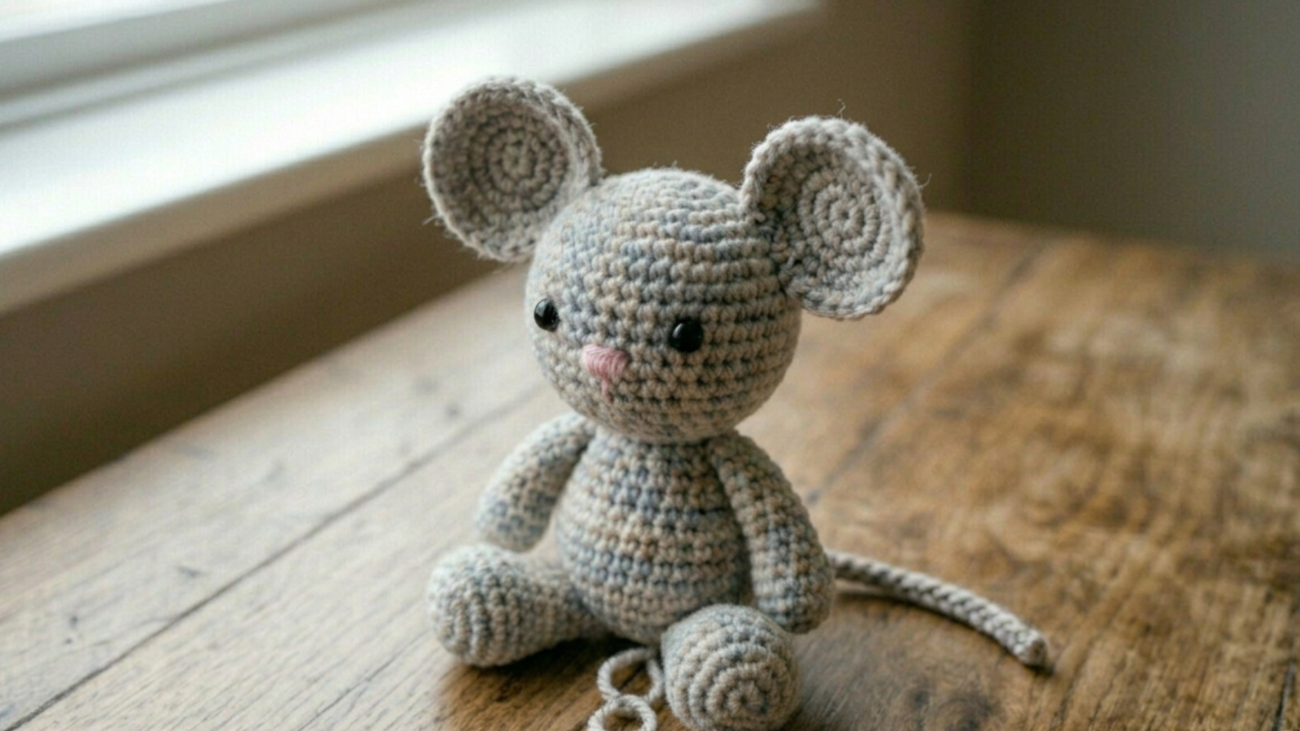
Why it’s great for beginners: This is one of the quickest toys you can make. A mouse is basically a teardrop shape, two flat circle ears, and a long yarn tail. You could finish one in under 90 minutes.
Little mice make the cutest cat toys (use catnip inside instead of stuffing!), ornaments, keychains, or baby shower gifts when made in pink or grey.
Basic Steps:
- Make a teardrop/oval body by starting increases like a ball, then crocheting more straight rows on one end before decreasing.
- Make two small flat circles for ears.
- Attach safety eyes (or embroider) near the pointy end of the body.
- Sew ears on top.
- For the tail, cut a long strand of yarn and attach it securely at the back.
Tips: Slightly pinch the nose end before closing and stuffing to get that classic mouse-face shape.
5. Crochet Fish

Why it’s great for beginners: Fish are flat (or slightly 3D) and super forgiving. You can make them in any color, add stripes, and they always turn out cute. Plus, you’ll learn how to crochet a tail fin, which is a slightly different technique that expands your skills.
These are amazing made in bright tropical colors — think electric blue, orange, and yellow. Line a few up and you’ve got an adorable underwater display.
Basic Steps:
- Make an oval body by crocheting back and forth in rows (instead of rounds) and shaping as you go.
- Stuff lightly and sew the sides together.
- For the tail: crochet two small flat triangles and sew them to the back end of the body.
- Add safety eyes.
- Optionally, crochet tiny fins and sew them on top and sides.
Tips: Use two strands of yarn held together for a chunkier, more satisfying fish. Great for using up yarn scraps!
6. Crochet Strawberry
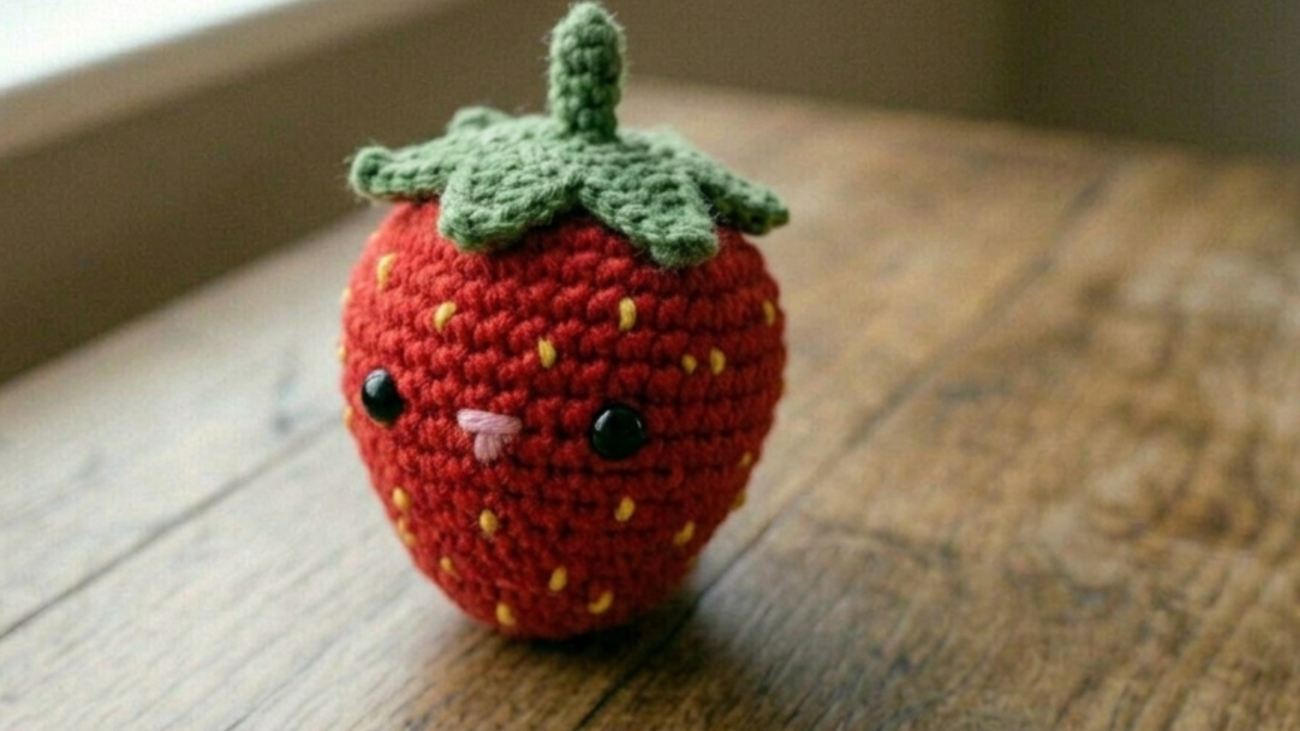
Why it’s great for beginners: Okay, so this one isn’t exactly an animal — but crochet fruit toys are EVERYWHERE right now, and strawberries are the most popular by far. They’re quick, they use minimal yarn, and they look ridiculously cute in a little bowl or basket.
A crochet strawberry teaches you how to add texture and surface details (the little yellow “seed” dots embroidered on), plus a leafy green top, which is a slightly new shape to master.
Basic Steps:
- Crochet the body in red yarn — it’s basically a ball that’s slightly pointy at the bottom. Use the same magic ring and increase/decrease method.
- For the leaves: switch to green yarn and crochet 5 small pointed leaf shapes.
- Attach the leaves to the top of the strawberry.
- Using yellow yarn and your yarn needle, embroider tiny “V” shapes all over the red body for the seeds.
Tips: The more evenly spaced your embroidered seeds are, the more realistic your strawberry looks. Take your time with this detail — it makes a huge difference!
7. Crochet Snail
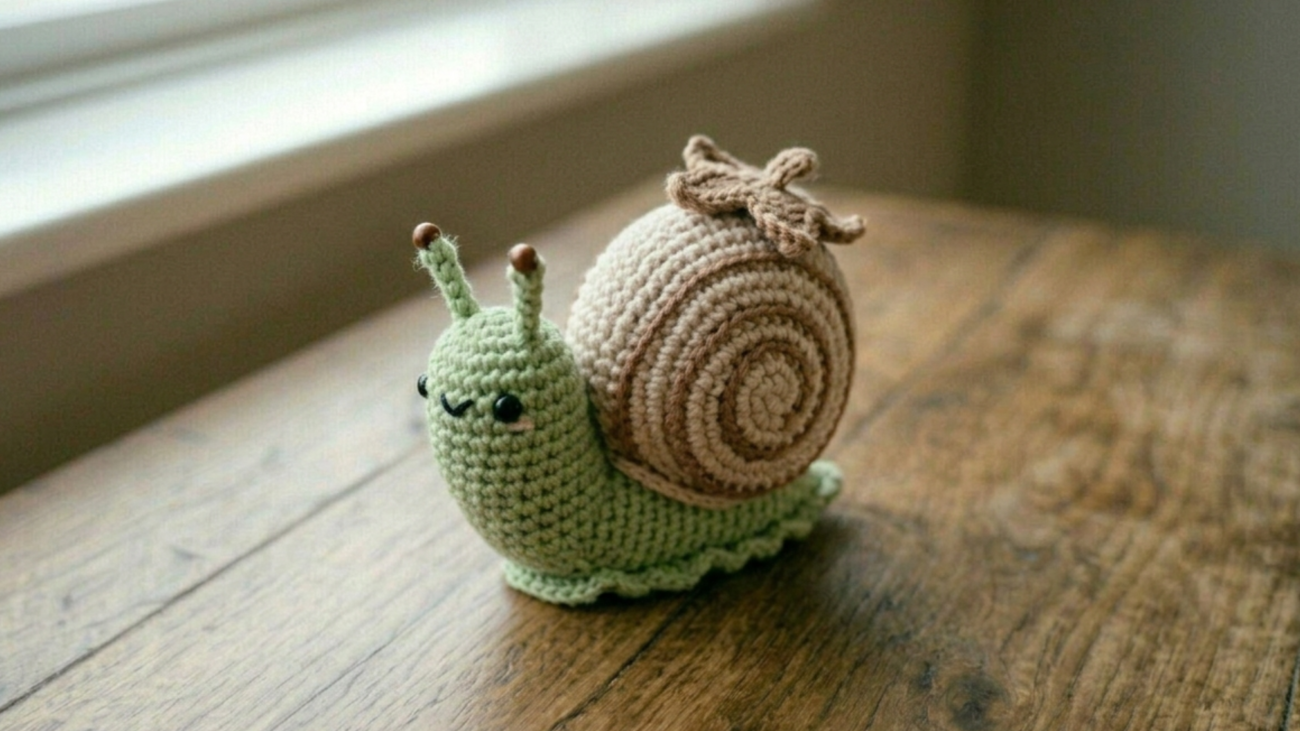
Why it’s great for beginners: The snail is the star of this list. It looks SO complicated, but it’s actually just a spiral roll for the shell and a simple elongated body. The contrast between the two pieces makes people think you’re way more advanced than you are. It’s the ultimate beginner “flex.”
Snails are endlessly customizable — change the shell color, give your snail a little smile, add tiny antennae — and they’re just so charming.
Basic Steps:
- For the shell: Start a long crochet tube (about 20–25 rounds long), stuff as you go, then coil it tightly into a spiral and sew it together to hold the shape.
- For the body: Crochet a slightly flattened oval/teardrop shape in a contrasting color.
- Attach the shell on top of the body, sewing securely all around the base.
- For antennae: Crochet two tiny chains with a small ball at the end, attach to the head area.
- Add eyes just below the antennae.
- Embroider a little smile if you like.
Tips: When coiling the shell, use pins to hold the spiral in place before sewing. This keeps it from unraveling while you work!
Common Beginner Mistakes (And How to Avoid Them)
Since you’re just starting out, here are a few things that trip up almost every new crocheter — and how to fix them before they happen:
Losing count of stitches – Use a stitch marker at the start of every round. Seriously, it’s a game changer. Count at the end of each round before moving on.
Tension too tight or too loose – If your hook feels like it’s fighting the yarn, loosen up. Your stitches should slide along the hook easily. Tension gets better the more you practice — don’t stress.
Holes in your work – This usually means your tension is too loose OR you’re accidentally skipping stitches. Slow down, count carefully, and don’t rush.
Stuffing at the end – Always stuff before you close up! Trying to stuff through a tiny hole is a nightmare. Stuff as you go, especially on larger pieces.
Not weaving in ends properly – Weave your ends through at least 4–5 stitches in different directions. Skipping this step means your toy will unravel over time.
Final Thoughts
There’s something really magical about starting with a ball of yarn and ending up with something you can hold in your hands — something with a little face, a little personality, a little bit of you in every stitch.
These 7 crochet toy patterns are simple enough for absolute beginners but charming enough that you’ll want to keep making them even after you’ve leveled up your skills. Start with the ball to warm up, move on to the bear or bunny, and before you know it, you’ll have a whole little family of crocheted creatures sitting on your shelf.
The best part? Every single one of these makes a beautiful handmade gift. Nothing says “I made this with love” quite like a hand-crocheted toy.
So grab your yarn, pick your favorite from this list, and get started. You’ve totally got this! 🧶
Have you tried any of these patterns? We’d love to see your finished toys! Share your creations in the comments below or tag us on Instagram. Happy crocheting!